Browse » Home » All posts
Tuesday, March 10, 2009
LINGOES TRANSLATOR ~A FREE DICTIONARY~
Lingoes is a free language translator software. It support many collection of free dictionary and support online translation via google translate, yahoo translate and other online translation resources. Branded dictionaries, thesaurus and encyclopedias are also provided free for download on Lingoes website. You can download Lingoes here
Features :
1. Translation over 80 languages
2. Capture word on screen for direct translation
3. Text to speech support
4. Free dictionaries and encyclopedias (Cambridge, Wordnet, Meriam-Webster, Oxford, etc)
5. Integrated small application (appendices)
Here’s the basic manual for using Lingoes
1. Translating a single word
Just type the text you want to translate on the text area on top of Lingoes window and hit enter.
2. Translating a paragraph
1. Click the Text Translation button on the right panel
2. Type or paste the paragraph you want to translate
3. Choose the translation engine (google, yahoo, etc)
4. Choose the translation direction (English => Japanese)
5. Click Translate
Notes:
Make sure that you’re connected to the internet for translation to work
3. Capture word on screen
1. Select the word you want to translate
2. Press Ctrl + Right click (default)
3. The translation result then will pop-out on the window
4. Installing new dictionaries
1. Click the guide tab (the second tab on the left side of lingoes)
2. Click dictionaries
3. Click Install From Lingoes or click Install if you already downloaded one
Read more...
Thursday, February 12, 2009
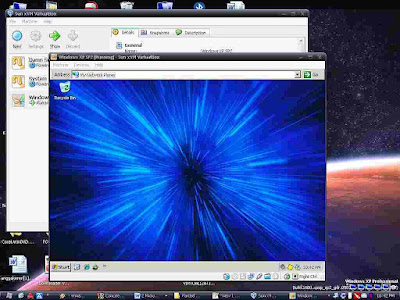
PC VIRTUALIZATION USING VIRTUALBOX (Part 2 of 2)

In this lesson we’ll try to install Windows XP in Virtual PC environment. Here’s the requirement for doing this tutorial:
1. A PC with VirtualBox installed and configured for Windows XP (if you don’t know how to do this, please follow this link)
2. A Windows XP Original CD
3. A snack, maybe……
Ok everybody, fasten your seatbelt and let the show begin…..
1. A New Beginning
- Open your VirtualBox main window
- Insert your Windows XP installation CD into CD Drive
- Start your WindowsXP Virtual Machine by hitting Start button
- If you received a notification about no bootable medium in your Virtual PC, click Devices menu > Mount CD/DVD-Rom > Host Drive (Your CD Drive:) then click Machine > Reset or Right Ctrl + R
2. A Good Start
- If everything goes right, you will see the Windows Setup window
- If you are ready for installing Windows, hit ENTER on your keyboard
- Select the partition you want to install Windows
- Follow the rest of Windows installation then restart your computer when asked
3. Adding Supplement for Your New Windows XP
- You’ll need to install VirtualBox Guest Addition for enabling advance features for your guest OS
- On Windowed mode, click Devices > Install Guest Additions
- The Guest Addition window will now appear, if not please run it manually from My Computer > CD Drive
- Follow the installation instruction, restart your computer when asked
4. Testing your Brand New Windows XP
- Try switching to Fullscreen Mode by pressing Right Ctrl + F
- Try Seamless Mode by pressing Right Ctrl + L. You’ll see the window that are displayed within virtual machine will appear side by side next to the window of your host.
- Try saving snapshot for your virtual machine, you can save state your current virtual machine state and revert it back to original state when needed. On the VirtualBox main window click Snapshots tab > Click Take Snapshot button (the button with camera icon). To revert it back to original state click “Revert to Current Snapshot”
Notes:
- Press Right Ctrl on your keyboard if you want to get control of your mouse back from virtual machine window.
- Press Right Ctrl + L for activating Seamless Mode. In this mode you can have your virtual machine window appear side by side next to window of your host. (This mode only available if you already installed the VirtualBox Guest Addition)
- Installed RAM will be spared for the virtual machine so make sure your host operating system still have enough RAM for running properly or your virtual machine will be halted or maybe both of them will be crashed.
- You can manage your current Virtual Hard Disk, CD/DVD Image and Floppy Image by clicking File > Virtual Media Manager on VirtualBox main GUI.
- Don’t forget to install Guest Additions for your guest operating system otherwise your guest operating system wont work properly. (It will install mouse, VGA and sound driver for your guest OS).
This article concluded our tutorial of PC Virtualization Software. That’s all for now, see you on the next tutorial in my headquarters. I really appreciate if you spent your little time for leaving comments or maybe suggestion for me. Sorry for my bad English. ^-^
Read more...
Monday, February 9, 2009
PC VIRTUALIZATION USING VIRTUALBOX (Part 1 of 2)
VirtualBox is one of PC Virtualization software. It’s free, run in many host operating system [Windows, Linux, Apple Mac OS and Solaris] and support many guest operating system [DOS, Windows, Linux, BS and OS/2]. You can download it here.
In this article I’ll show you how to install a Windows operating system on your current Windows operating system (If you’re using Microsoft Windows) using VirtualBox. This first part of the tutorial will assist you in setting up a new virtual machine for your guest operating system.
1. Creating a New Virtual Machine (VM)
- Click Start > Programs > Sun xVM VirtualBox > VirtualBox
- Click New > Next
- Type the VM name
- Choose the Guest OS Type
- Click Next
2. Allocating RAM for your VM
- Move the slider as needed (Min. 128 MB for Windows XP)
- Click Next
Notes: Choose this setting carefully, make sure that the allocated RAM for your VM not exceeding your installed RAM.
3. Specifying a Virtual Hard Disk for your VM
- Click New
- Click Next
- Choose Fixed-size storage (recommended for better performance)
- Click Next
- Set the location of the Virtual Disk
- Specify the Virtual Disk size (Min. 1.5 GB for Windows XP)
- Click Next
- Click Finish,
- Proceed to next step by clicking Next then Finish
4. Advance Setting and Tweaks for your VM
- Click Setting on the main VirtualBox window (you will see the settings for your current VM)
- Tweaks
\\ On General > Basic Tab
> Specify the Video Memory Size (optional)
> Enable 3D Acceleration
\\ On Hard Disks Tab
> Enable SATA Controller
> Choose SATA Port 0 for your current Hard Disk
> Add new Virtual Disk for your secondary storage (optional)
\\ On CD/DVD Rom Tab
> Check Mount CD/DVD Drive
> Specify your Windows XP installation CD location (ISO Image or Host Drive) – this is will be used when installing guest operating system
\\ On Floppy Drive Tab
> Check Mount Floppy Drive (optional)
\\ On Audio Tab
> Check Enable Audio (for audio output support)
> Choose Windows DirectSound (enable audio)
> Choose Audio Controller
\\ On Network Tab
> Check Enable Network Adapter (for communicating with outside world ^_^).
> Check Cable Connected (plugged)
\\ On Serial Ports Tab
> Check Enable Serial Port (optional)
\\ On USB Tab
> Check Enable USB Controller
> Check Enable USB 2.0 (EHCI) Controller (for USB 2.0 support)
\\ On Shared Folders Tab
> Add new folder that you want to be shared with the guest operating system
- Click OK
5. Gentleman Start Your Engines!!
- Click Start to run your Brand New Virtual Machine
6. Installing Guest Operating System
- To be concluded …. [part 2]
The rest of tutorial will be concluded on the second part of this tutorial. That’s all for now, as always I hope this “short” explanation will be helpful for you. Don’t forget to leave comments okay? ^_^
WORKING WITH MULTIPLE DESKTOP
Deskpot is a virtual desktop utility. You can make a virtual desktop up to 20 desktops, switching between desktop, moving application from one to other desktop and assigning different wallpapers to each desktop. You can download Deskpot here.
Configuring Deskpot
1. The First Impression
- You can run Deskpot from Start Menu > Deskpot x.x > Deskpot x.x
(x.x = build number)
- Deskpot now will resident on the system tray
2. Configuring Deskpot Setting
- Right click on the Deskpot icon on the system tray
- Click Setting
- On the General tab, choose the number or desktop you want
- Check Start automatically with Windows (optional)
- Click Controls tab
- Choose the key combination for switching between desktop on the Switch desktop section
- Click Apply then OK
Notes: You can fine tune the settings to fulfill your needs. The settings above are the most used by me.
3. Configuring Desktop Appearance
- Right click on the Deskpot icon on the system tray
- Click Configure Desktops
- In this window you can assign different wallpaper and resolution for each desktop
- On the Properties tab, name your desktop and choose the desktop resolution you want
- On the Background tab, choose the wallpaper for current desktop
- On the Tools tab, you can hide desktop components and tweak the desktop appearance
- On the Start-Up, you can autorun an application when entering or exiting current desktop
4. Working with Multiple Desktop
- To switch between desktop, right click on the desktop icon on the system tray, choose the desktop you want to switch or you can use the hotkey that has been assigned in step 2
- To preview your desktops, right click on the desktop icon on the system tray, click Full-screen preview
- To move an application window to another desktop, right click on the application bar on the taskbar, choose Deskpot > Move > Desktop x
- To copy an application window to another desktop, right click on the application bar on the taskbar, choose Deskpot > Copy > Desktop x
Notes: You can also access this menu by right clicking the active window title. If the menu doesn’t appear, on the desktop setting window, click Appearance tab, give check on Add Deskpot entries to the system menus of all windows.
Okay, that’s all for now. As always, I hope this “short” explanation will be helpful for you. Don’t forget to leave comments okay? ^_^.
Tuesday, January 27, 2009
CATALOGING YOUR CD-DVD OR DISK COLLECTION
I would recommend VisualCD for CD/Disk cataloging because the features are complete enough for cataloging purposes and also the indexing speed is quick. InsdeCAT offers more features but the indexing speed is rather slow. OfflineCDBrowser (OCDB) lack in features and it’s can only be used to index your files structure but it’s the quickest of them all.
CD CATALOGING TUTORIAL USING VISUAL CD
Step 1. Run VisualCD from Start Menu
![]() |
| VisualCD GUI |
You know how to do this one…
Step 2. Configuring VisualCD
![]() |
| Configuring Visual CD |
- Click Options > Configuration
- Click Catalog tab
- Select the information you want to be indexed (ID3 Tag, Picture Information, etc.). If you include many options, it will slow down the indexing process. I recommend disabling some features to speed up indexing process.
- Click Apply then OK
Step 3. Begin cataloging your CD
![]() |
| Creating New Catalog |
- Insert the CD you want to be indexed in CD/DVD Drive (you don’t have to insert anything if you just want to index your hardisk contents)
- Click Files > New
- Browse for files you want to be indexed
- Insert the catalog filename
- Set the catalog location
- Set the volume label (e.g MyBackup001)
- Add the catalog description (e.g My First CD Catalog)
- Click OK
Step 4. Searching for files in the catalog
![]() |
| Searching Files in Catalog |
- Click Search > Files in Catalogs ..
- Type the information you want to find on Search Bar (e.g filename, ID3 Tags, etc.)
- If you want to include other catalog files, Click List > Add Catalog
- Set the Search Option (As needed)
- Click Seach Now
- View the Result in Search Results tab
Tips :
- You can update your catalog files by clicking Tools > Update Catalog ..
- You can password protect your catalog files by clicking Tools > Change Password
Okay, that’s all for now. As always, I hope this “short” explanation will be helpful for you. Don’t forget to leave comments okay? ^_^.
To translate this page in your language, click here
Untuk menterjemahkan halaman ini ke bahasa lain klik disini
Nokia Symbian S40 vs Symbian S60
Perbedaan OS Nokia Symbian S60 dengan OS Nokia Symbian S40 :
1. Nokia Symbian S60 memiliki tombol menu sedangkan Nokia Symbian S40 tidak.
Mari kita mulai dengan membedakan secara cepat mana handset dengan sistem operasi Symbian S40 dan Symbian S60.
Mengenali handset Nokia Symbian S60 cukup mudah ditandai dengan adanya tombol menu khusus untuk masuk ke menu utama. Pada handset Nokia Symbian S40 tidak ada tombol menu melainkan hanya softkey kiri dan kanan. (maaf, belum ada gambarnya untuk saat ini.)
Kedua perbedaan ini dapa anda gunakan untuk membedakan secara cepat ketika anda melihat suatu ponsel Nokia apakah ia menggunakan sistem operasi Nokia Symbian S40 atau Nokia Symbian S60.
2. Nokia Symbian S60 dapat menjalankan aplikasi Symbian sedangkan Nokia Symbian S40 tidak.
Memang aneh karena meskipun mengusung nama Symbian, Nokia Symbian S40 hanya dapat menjalankan aplikasi Java (.jar) dan tidak dapat menjalankan aplikasi Symbian (.sis). Sedangkan Nokia Symbian S60 sudah barang tentu dapat menjalankan aplikasi Symbian (.sis). Hal ini menjadikan Nokia Symbian S60 memiliki lebih banyak pilihan aplikasi untuk dijalankan.
3. Nokia Symbian S60 dapat terinfeksi virus sedangkan Nokia Symbian S40 tidak.
Benarkah demikian? Memang ternyata Nokia Symbian S40 tidak dapat terkena virus (sepanjang pengetahuan penulis sih begitu ...) karena Nokia Symbian S40 hanya dapat menjalankan Java sedangkan Nokia Symbian S60 berpotensi terinfeksi virus dari aplikasi Symbian. Hal ini menjadi nilai plus bagi Nokia Symbian S40 karena imun terhadap segala jenis virus ponsel sedangkan Nokia Symbian S60 harus diimunisasi dengan antivirus khusus Symbian agar tidak terinfeksi virus.
4. Nokia Symbian S60 dapat melakukan multitasking sedangkan Nokia Symbian S40 tidak.
Salah satu kelebihan lain dari Nokia Symbian S60 adalah kemampuannya untuk melakukan multitasking (menjalankan lebih dari satu aplikasi dalam satu waktu) sehingga memudahkan mereka yang sering berpindah-pindah antar aplikasi tanpa menutup aplikasi yang sedang berjalan. Sedangkan pada Nokia Symbian S40 yang notabene hanya dapat menjalankan satu aplikasi pada satu waktu maka anda harus bergantian ketika akan menjalankan aplikasi yang lain.
Sebagai contoh bila anda menggunakan handset Nokia Symbian S40 dan anda sedang chatting di eBuddy kemudian anda ingin browsing melalui Opera Mini anda hanya perlu meminimize aplikasi eBuddy dan menjalankan Opera Mini tanpa harus menutup eBuddy, namun bagi anda pengguna Nokia Symbian S40 maka anda harus menutup aplikasi eBuddy ketika akan menjalankan Opera Mini.
5. Aplikasi pada Nokia Symbian S40 tidak perlu di Install hanya di Copy-Paste-kan sedangkan pada Nokia Symbian S60 sebaliknya.
Ada lagi kelebihan Nokia Symbian S40 dari kemudahannya dalam menginstall aplikasi yaitu semua aplikasi yang berjalan di Nokia Symbian S40 dapat langsung si Copy-Paste-kan ke dalam handset bila anda menginstalasikannya dari PC. Sedangakan pada Nokia Symbian S60 ada proses instalasi ketika ingin menginstall aplikasi seperti layaknya sebuah PC.
Nah, anda kini telah mengetahui perbedaan antara handset Nokia Symbian S40 dengan OS Nokia Symbian S60 (bagi yang belum tahu ..). Kini anda mungkin menanyakan mana sistem operasi yang lebih baik apakah Nokia Symbian S40 atau Nokia Symbian S60.
Jawabannya tergantung dari selera dan kebutuhan anda. Bila anda tak ingin repot dengan urusan virus dan ingin kepraktisan dalam menginstall aplikasi maka Nokia Symbian S40 pilihannya. Sebaliknya bila anda ingin handset Nokia dengan kemampuan multitasking dan pilihan aplikasi yang lebih banyak maka Nokia Symbian S60 pilihan anda.
Baiklah, sekian untuk sekarang, jangan lupa bila anda berkenan tinggalkan sedikit komentar, kritik ataupun saran pada kolom komentar dibawah. Semoga artikel ini bermanfaat.
Tag :
gadget
Friday, January 23, 2009
WRITING HIRAGANA-KATAKANA IN WINDOWS XP (NATURAL INPUT)
Writing katakana or hiragana in WindowsXP can be done by configuring your keyboard layout to Japanese then you can type hiragana-katakana with natural input ( WYTWYG --> What You Type Is What You Get n_n).
Okay let's begin .....
Step 1. Journey to the Center of the Computer
Click Start > Control Panel > Regional and Language Options
Step 2. Installing Supplemental Language Support
- Go to Languages tab, give mark on Install files for East Asian Languages then click apply
- Insert Windows XP CD to CD Drive when asked
Step 3. Enabling Language Bar
Right click on the Taskbar > Choose Toolbar > Language Bar
Step 4. Adding Keyboard input for Japanese
- Right click on the Language Bar > Click Settings..
- Go to Settings Tab
- Choose Japanese
- Click Add > Keyboard Input/IME > Microsoft IME Standard 2002 ver. 8.1
- Click OK
Step 5. Writing Hiragana-Katakana with Natural Input
Natural Input --> WYTWYG (What You Type Is What You Get)
- On the language bar left click [EN] (English) button (if you’re using English keyboard layout)
- Choose Japanese [JP]
- Click Input Mode > Choose whatever you want (Hiragana/Katakana)
- Begin typing …
e.g if you want to type SAKURA in Japanese, then all you need to do is begin typing SA-KU-RA 「さくら」in you keyboard then it will be converted automatically in Hiragana/Katakana.
Extra Notes :
- If you unable to see extra button of the language bar, click on [EN]/[JP] button then click Show the Language Bar.
- You can press Left Alt + Shift to change between languages.
Okay, that’s all for now. I hope this “short” explanation will be helpful for you. Don’t forget to leave comment okay? ^_^ (Sorry, no pictures yet).
To translate this page in your language, click here
Untuk menterjemahkan halaman ini ke bahasa lain klik disini
Read more...
Subscribe to:
Posts (Atom)
.jpg)