


.jpg)


VirtualBox is one of PC Virtualization software. It’s free, run in many host operating system [Windows, Linux, Apple Mac OS and Solaris] and support many guest operating system [DOS, Windows, Linux, BS and OS/2]. You can download it here.
In this article I’ll show you how to install a Windows operating system on your current Windows operating system (If you’re using Microsoft Windows) using VirtualBox. This first part of the tutorial will assist you in setting up a new virtual machine for your guest operating system.
1. Creating a New Virtual Machine (VM)

- Click Start > Programs > Sun xVM VirtualBox > VirtualBox
- Click New > Next
- Type the VM name
- Choose the Guest OS Type
- Click Next
2. Allocating RAM for your VM
- Move the slider as needed (Min. 128 MB for Windows XP)
- Click Next
Notes: Choose this setting carefully, make sure that the allocated RAM for your VM not exceeding your installed RAM.
3. Specifying a Virtual Hard Disk for your VM
- Click New
- Click Next
- Choose Fixed-size storage (recommended for better performance)
- Click Next
- Set the location of the Virtual Disk
- Specify the Virtual Disk size (Min. 1.5 GB for Windows XP)
- Click Next
- Click Finish,
- Proceed to next step by clicking Next then Finish
4. Advance Setting and Tweaks for your VM

- Click Setting on the main VirtualBox window (you will see the settings for your current VM)
- Tweaks
\\ On General > Basic Tab
> Specify the Video Memory Size (optional)
> Enable 3D Acceleration
\\ On Hard Disks Tab
> Enable SATA Controller
> Choose SATA Port 0 for your current Hard Disk
> Add new Virtual Disk for your secondary storage (optional)
\\ On CD/DVD Rom Tab
> Check Mount CD/DVD Drive
> Specify your Windows XP installation CD location (ISO Image or Host Drive) – this is will be used when installing guest operating system
\\ On Floppy Drive Tab
> Check Mount Floppy Drive (optional)
\\ On Audio Tab
> Check Enable Audio (for audio output support)
> Choose Windows DirectSound (enable audio)
> Choose Audio Controller
\\ On Network Tab
> Check Enable Network Adapter (for communicating with outside world ^_^).
> Check Cable Connected (plugged)
\\ On Serial Ports Tab
> Check Enable Serial Port (optional)
\\ On USB Tab
> Check Enable USB Controller
> Check Enable USB 2.0 (EHCI) Controller (for USB 2.0 support)
\\ On Shared Folders Tab
> Add new folder that you want to be shared with the guest operating system
- Click OK
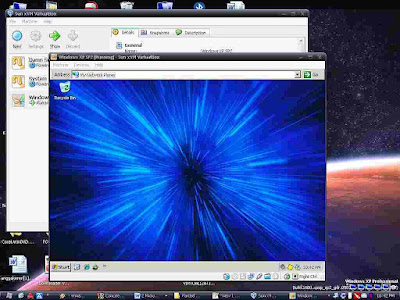
5. Gentleman Start Your Engines!!
- Click Start to run your Brand New Virtual Machine
6. Installing Guest Operating System
- To be concluded …. [part 2]
The rest of tutorial will be concluded on the second part of this tutorial. That’s all for now, as always I hope this “short” explanation will be helpful for you. Don’t forget to leave comments okay? ^_^


1 comment:
thanks for the info
Post a Comment