Dragonrider's Headquarter

Thursday, February 12, 2009

PC VIRTUALIZATION USING VIRTUALBOX (Part 2 of 2)


Let’s resume our lesson about PC Virtualization using VirtualBox. If you haven’t been in this class before, please follow this link. Okay if you’re ready, now open your VirtualBox window and follow the given instruction.
In this lesson we’ll try to install Windows XP in Virtual PC environment. Here’s the requirement for doing this tutorial:


1. A PC with VirtualBox installed and configured for Windows XP (if you don’t know how to do this, please follow this link)
2. A Windows XP Original CD
3. A snack, maybe……

Ok everybody, fasten your seatbelt and let the show begin…..

1. A New Beginning
- Open your VirtualBox main window
- Insert your Windows XP installation CD into CD Drive
- Start your WindowsXP Virtual Machine by hitting Start button
- If you received a notification about no bootable medium in your Virtual PC, click Devices menu > Mount CD/DVD-Rom > Host Drive (Your CD Drive:) then click Machine > Reset or Right Ctrl + R


2. A Good Start
- If everything goes right, you will see the Windows Setup window


- If you are ready for installing Windows, hit ENTER on your keyboard
- Select the partition you want to install Windows
- Follow the rest of Windows installation then restart your computer when asked

3. Adding Supplement for Your New Windows XP


- You’ll need to install VirtualBox Guest Addition for enabling advance features for your guest OS
- On Windowed mode, click Devices > Install Guest Additions
- The Guest Addition window will now appear, if not please run it manually from My Computer > CD Drive
- Follow the installation instruction, restart your computer when asked

4. Testing your Brand New Windows XP
- Try switching to Fullscreen Mode by pressing Right Ctrl + F
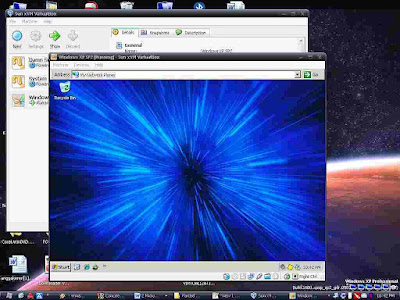
- Try Seamless Mode by pressing Right Ctrl + L. You’ll see the window that are displayed within virtual machine will appear side by side next to the window of your host.
- Try saving snapshot for your virtual machine, you can save state your current virtual machine state and revert it back to original state when needed. On the VirtualBox main window click Snapshots tab > Click Take Snapshot button (the button with camera icon). To revert it back to original state click “Revert to Current Snapshot”

Notes:
- Press Right Ctrl on your keyboard if you want to get control of your mouse back from virtual machine window.

- Press Right Ctrl + L for activating Seamless Mode. In this mode you can have your virtual machine window appear side by side next to window of your host. (This mode only available if you already installed the VirtualBox Guest Addition)

- Installed RAM will be spared for the virtual machine so make sure your host operating system still have enough RAM for running properly or your virtual machine will be halted or maybe both of them will be crashed.

- You can manage your current Virtual Hard Disk, CD/DVD Image and Floppy Image by clicking File > Virtual Media Manager on VirtualBox main GUI.


- Don’t forget to install Guest Additions for your guest operating system otherwise your guest operating system wont work properly. (It will install mouse, VGA and sound driver for your guest OS).

This article concluded our tutorial of PC Virtualization Software. That’s all for now, see you on the next tutorial in my headquarters. I really appreciate if you spent your little time for leaving comments or maybe suggestion for me. Sorry for my bad English. ^-^
Read more...

Monday, February 9, 2009

PC VIRTUALIZATION USING VIRTUALBOX (Part 1 of 2)


PC Virtualization software is application that can be used to make a virtual PC environment in your PC. You can run a Linux liveCD in your Windows without having to restart your PC, install new OS without having to partition your disk or maybe testing new software without messing your registry. PC Virtualization runs directly on top of your current operating system and runs like a normal application. PC Virtualization consists of two elements, the “host” or your physical PC (Real PC) and “guest” or your virtual machine (VirtualPC).
VirtualBox is one of PC Virtualization software. It’s free, run in many host operating system [Windows, Linux, Apple Mac OS and Solaris] and support many guest operating system [DOS, Windows, Linux, BS and OS/2]. You can download it here.

In this article I’ll show you how to install a Windows operating system on your current Windows operating system (If you’re using Microsoft Windows) using VirtualBox. This first part of the tutorial will assist you in setting up a new virtual machine for your guest operating system.


1. Creating a New Virtual Machine (VM)


- Click Start > Programs > Sun xVM VirtualBox > VirtualBox
- Click New > Next
- Type the VM name
- Choose the Guest OS Type
- Click Next

2. Allocating RAM for your VM
- Move the slider as needed (Min. 128 MB for Windows XP)
- Click Next

Notes: Choose this setting carefully, make sure that the allocated RAM for your VM not exceeding your installed RAM.

3. Specifying a Virtual Hard Disk for your VM
- Click New
- Click Next
- Choose Fixed-size storage (recommended for better performance)
- Click Next
- Set the location of the Virtual Disk
- Specify the Virtual Disk size (Min. 1.5 GB for Windows XP)
- Click Next
- Click Finish,
- Proceed to next step by clicking Next then Finish

4. Advance Setting and Tweaks for your VM


- Click Setting on the main VirtualBox window (you will see the settings for your current VM)

- Tweaks
\\ On General > Basic Tab
> Specify the Video Memory Size (optional)
> Enable 3D Acceleration

\\ On Hard Disks Tab
> Enable SATA Controller
> Choose SATA Port 0 for your current Hard Disk
> Add new Virtual Disk for your secondary storage (optional)

\\ On CD/DVD Rom Tab
> Check Mount CD/DVD Drive
> Specify your Windows XP installation CD location (ISO Image or Host Drive) – this is will be used when installing guest operating system

\\ On Floppy Drive Tab
> Check Mount Floppy Drive (optional)

\\ On Audio Tab
> Check Enable Audio (for audio output support)
> Choose Windows DirectSound (enable audio)
> Choose Audio Controller

\\ On Network Tab
> Check Enable Network Adapter (for communicating with outside world ^_^).
> Check Cable Connected (plugged)

\\ On Serial Ports Tab
> Check Enable Serial Port (optional)

\\ On USB Tab
> Check Enable USB Controller
> Check Enable USB 2.0 (EHCI) Controller (for USB 2.0 support)

\\ On Shared Folders Tab
> Add new folder that you want to be shared with the guest operating system

- Click OK

5. Gentleman Start Your Engines!!
- Click Start to run your Brand New Virtual Machine

6. Installing Guest Operating System
- To be concluded …. [part 2]

The rest of tutorial will be concluded on the second part of this tutorial. That’s all for now, as always I hope this “short” explanation will be helpful for you. Don’t forget to leave comments okay? ^_^

Read more...

WORKING WITH MULTIPLE DESKTOP

Sometimes we’re working with many applications and windows. Opening many application and windows simultaneously will make your desktop and taskbar full and it will be difficult when we’re going to switch between windows. What if we’re able to use as many as desktop we want? Then this small but useful utility will help you out.
Deskpot is a virtual desktop utility. You can make a virtual desktop up to 20 desktops, switching between desktop, moving application from one to other desktop and assigning different wallpapers to each desktop. You can download Deskpot here.


Configuring Deskpot

1. The First Impression
- You can run Deskpot from Start Menu > Deskpot x.x > Deskpot x.x
(x.x = build number)
- Deskpot now will resident on the system tray


2. Configuring Deskpot Setting


- Right click on the Deskpot icon on the system tray
- Click Setting
- On the General tab, choose the number or desktop you want
- Check Start automatically with Windows (optional)
- Click Controls tab
- Choose the key combination for switching between desktop on the Switch desktop section
- Click Apply then OK

Notes: You can fine tune the settings to fulfill your needs. The settings above are the most used by me.

3. Configuring Desktop Appearance


- Right click on the Deskpot icon on the system tray
- Click Configure Desktops
- In this window you can assign different wallpaper and resolution for each desktop
- On the Properties tab, name your desktop and choose the desktop resolution you want
- On the Background tab, choose the wallpaper for current desktop
- On the Tools tab, you can hide desktop components and tweak the desktop appearance
- On the Start-Up, you can autorun an application when entering or exiting current desktop


4. Working with Multiple Desktop


- To switch between desktop, right click on the desktop icon on the system tray, choose the desktop you want to switch or you can use the hotkey that has been assigned in step 2
- To preview your desktops, right click on the desktop icon on the system tray, click Full-screen preview
- To move an application window to another desktop, right click on the application bar on the taskbar, choose Deskpot > Move > Desktop x
- To copy an application window to another desktop, right click on the application bar on the taskbar, choose Deskpot > Copy > Desktop x

Notes: You can also access this menu by right clicking the active window title. If the menu doesn’t appear, on the desktop setting window, click Appearance tab, give check on Add Deskpot entries to the system menus of all windows.

Okay, that’s all for now. As always, I hope this “short” explanation will be helpful for you. Don’t forget to leave comments okay? ^_^.

Read more...
 
Powered by Olark