


.jpg)


In this lesson we’ll try to install Windows XP in Virtual PC environment. Here’s the requirement for doing this tutorial:
1. A PC with VirtualBox installed and configured for Windows XP (if you don’t know how to do this, please follow this link)
2. A Windows XP Original CD
3. A snack, maybe……
Ok everybody, fasten your seatbelt and let the show begin…..
1. A New Beginning
- Open your VirtualBox main window
- Insert your Windows XP installation CD into CD Drive
- Start your WindowsXP Virtual Machine by hitting Start button
- If you received a notification about no bootable medium in your Virtual PC, click Devices menu > Mount CD/DVD-Rom > Host Drive (Your CD Drive:) then click Machine > Reset or Right Ctrl + R
2. A Good Start
- If everything goes right, you will see the Windows Setup window

- If you are ready for installing Windows, hit ENTER on your keyboard
- Select the partition you want to install Windows
- Follow the rest of Windows installation then restart your computer when asked
3. Adding Supplement for Your New Windows XP

- You’ll need to install VirtualBox Guest Addition for enabling advance features for your guest OS
- On Windowed mode, click Devices > Install Guest Additions
- The Guest Addition window will now appear, if not please run it manually from My Computer > CD Drive
- Follow the installation instruction, restart your computer when asked
4. Testing your Brand New Windows XP
- Try switching to Fullscreen Mode by pressing Right Ctrl + F
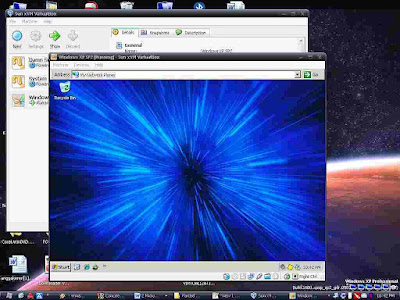
- Try Seamless Mode by pressing Right Ctrl + L. You’ll see the window that are displayed within virtual machine will appear side by side next to the window of your host.
- Try saving snapshot for your virtual machine, you can save state your current virtual machine state and revert it back to original state when needed. On the VirtualBox main window click Snapshots tab > Click Take Snapshot button (the button with camera icon). To revert it back to original state click “Revert to Current Snapshot”
Notes:
- Press Right Ctrl on your keyboard if you want to get control of your mouse back from virtual machine window.
- Press Right Ctrl + L for activating Seamless Mode. In this mode you can have your virtual machine window appear side by side next to window of your host. (This mode only available if you already installed the VirtualBox Guest Addition)
- Installed RAM will be spared for the virtual machine so make sure your host operating system still have enough RAM for running properly or your virtual machine will be halted or maybe both of them will be crashed.
- You can manage your current Virtual Hard Disk, CD/DVD Image and Floppy Image by clicking File > Virtual Media Manager on VirtualBox main GUI.
- Don’t forget to install Guest Additions for your guest operating system otherwise your guest operating system wont work properly. (It will install mouse, VGA and sound driver for your guest OS).
This article concluded our tutorial of PC Virtualization Software. That’s all for now, see you on the next tutorial in my headquarters. I really appreciate if you spent your little time for leaving comments or maybe suggestion for me. Sorry for my bad English. ^-^


No comments:
Post a Comment